2018.01.03 - posted in SSL
A little while ago I wrote about improvements in the SSL configuration of my webserver. You can read about that here.
I decided to check my SSL configuration with Qualys’ SSL Server Test again to see if there was room for improvement. Sure enough, there was.
The report
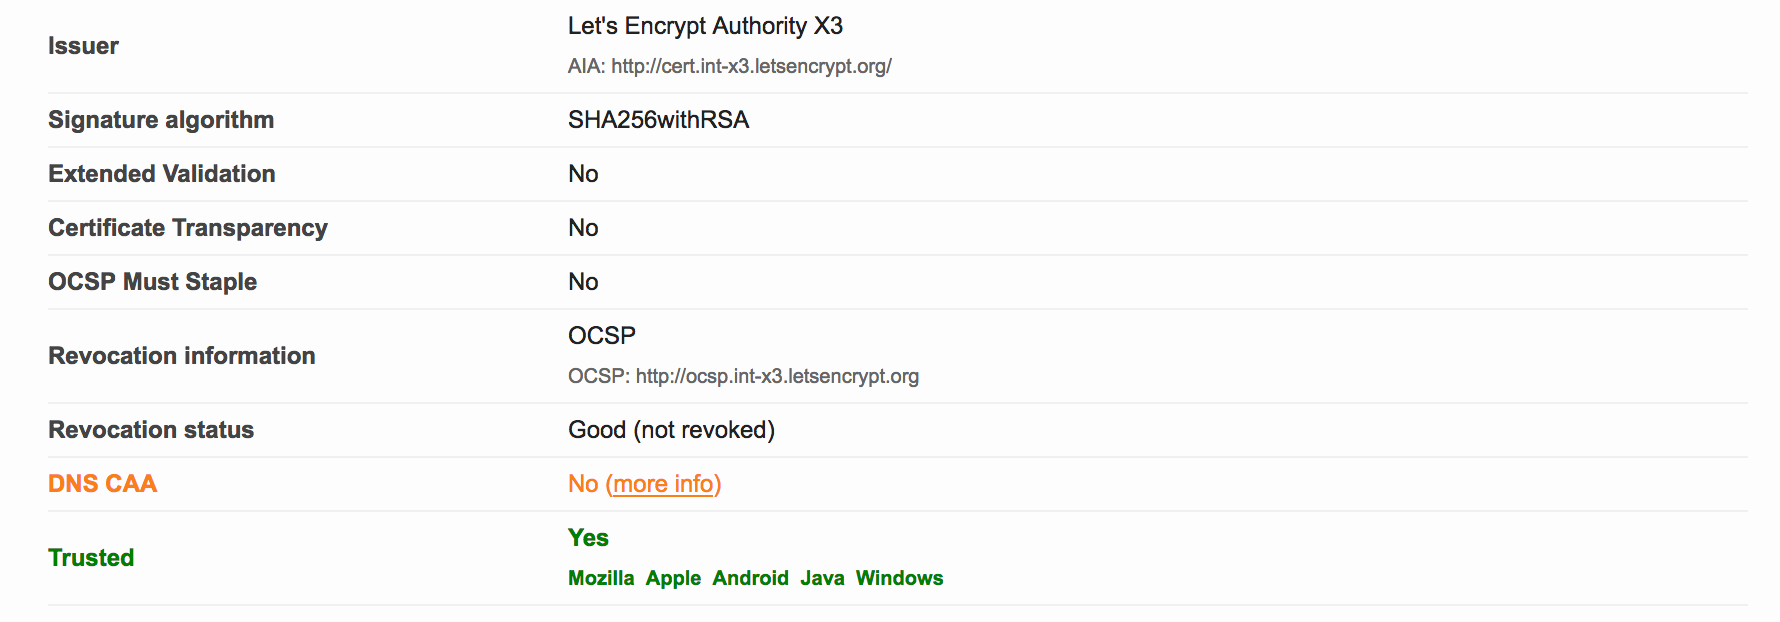
The report was still A+. However, I noticed two items that could possibly improved upon:
- No
DNS CAA - I’ll address that in this post
Weak 3DES ciphers - I’ll write another post about this
The cause
I had not yet implemented Certification Authority Authorization (or CAA), since I didn’t know what it was. The link in the SSL Labs report provides more information. In short, the PKI ecosystem is provided with a new control mechanism to restrict which CA’s may issue certificates for a specific domain. All you need to do is list the CA’s that you use for a specific domain in new CAA DNS record for that domain.
As of September 8, 2017, upon issuance of a new certificate for a domain, the CA is supposed to check the CAA records for that domain. If there is no matching CAA policy for the CA, the issuance should be denied (and it MAY be reported if the domain holder has iodef CAA record(s)).
From the RFC:
If the domain name holder specifies one or more iodef properties, a
certificate issuer MAY report invalid certificate requests to that
address.  In the following example, the domain name holder specifies
that reports may be made by means of email with the IODEF data as an
attachment, a Web service [RFC6546], or both:

$ORIGIN example.com
.       CAA 0 issue "ca.example.net"
.       CAA 0 iodef "mailto:security@example.com"
.       CAA 0 iodef "http://iodef.example.com/"
For those of you who want to have more in-depth information, see RFC 6844.
The solution
In my case, for voipmeister.com, I am using Let’s Encrypt as the CA for my certificates. So, if I want to implement a CAA policy, all I need to do is add DNS records like this:

The second one tells any interested party that I only use Let’s Encrypt as my CA. The first record is a request to inform me at a specific email address upon violations or problems concerning certificate issuance. I created those DNS records by hand, but you may also use the SSLMate CAA Record Helper.
After we wait a while for the recent DNS change to take effect, we can recheck with the SSL Labs Tester. The result is this:
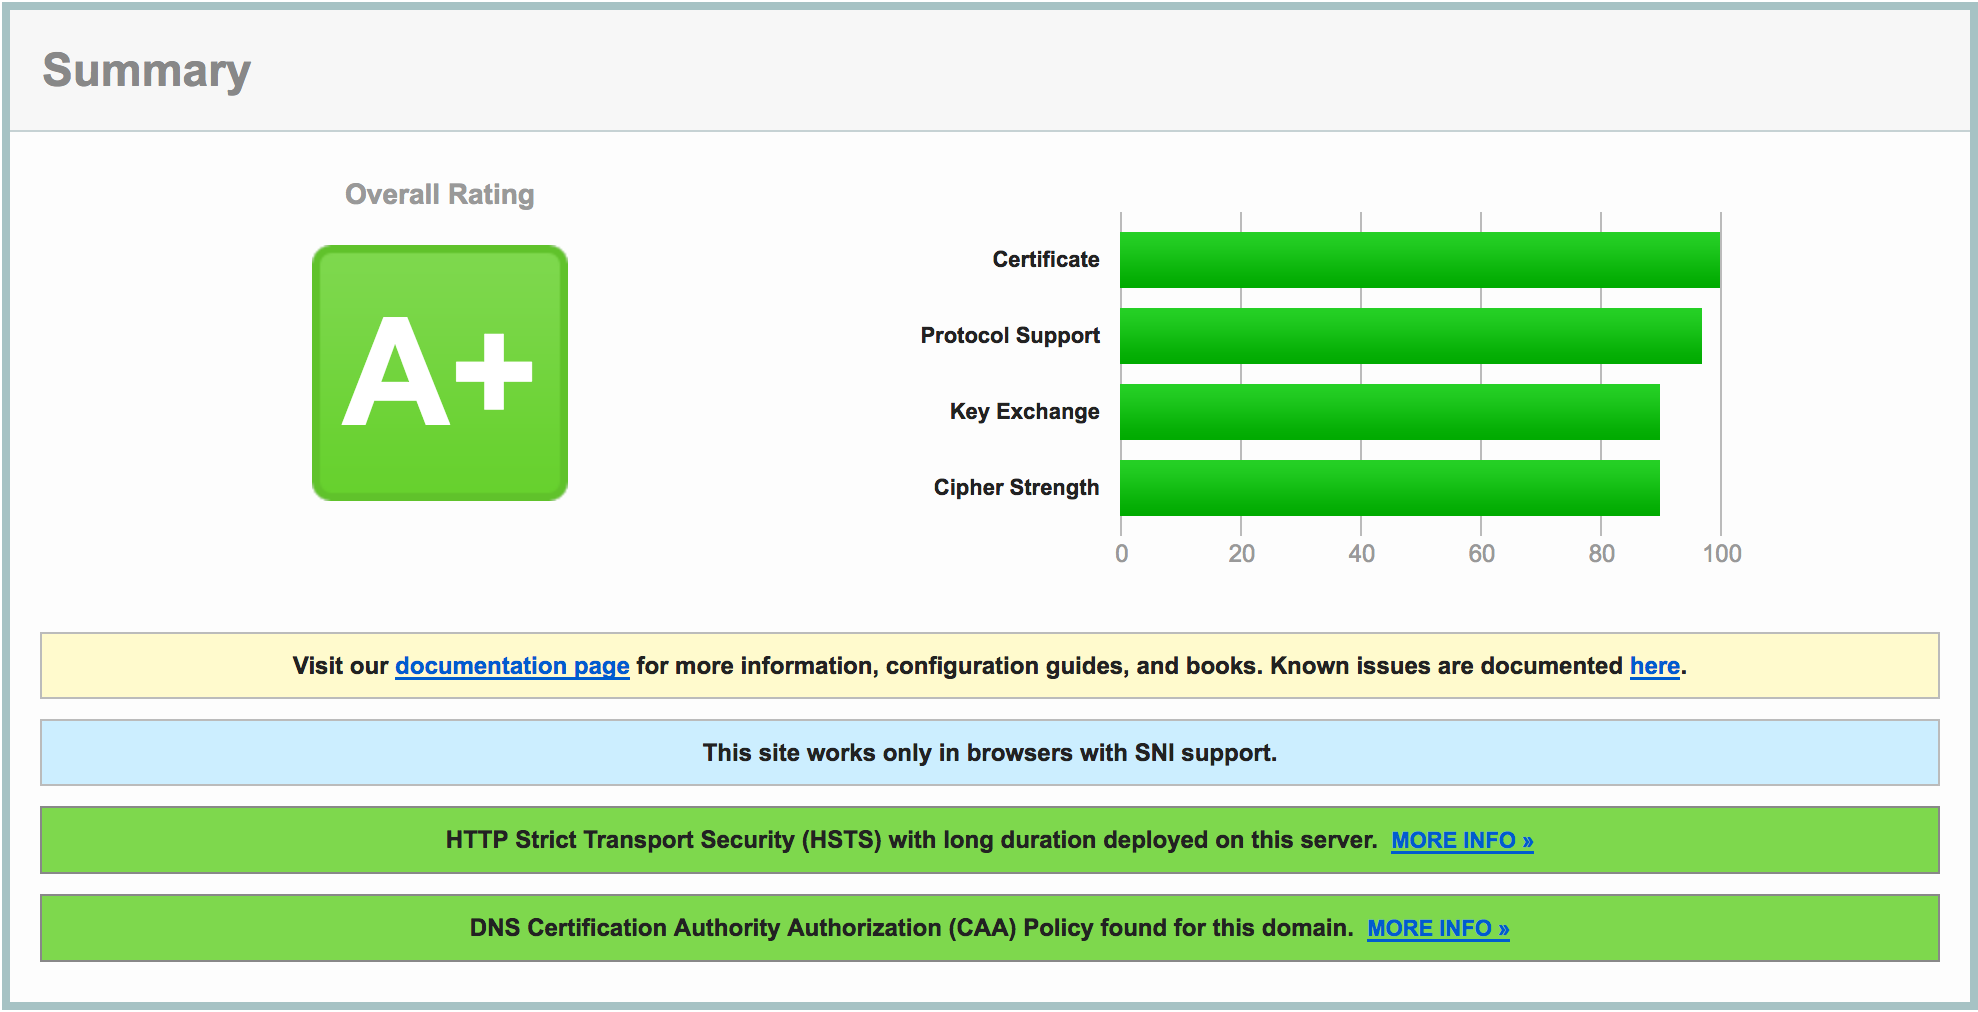
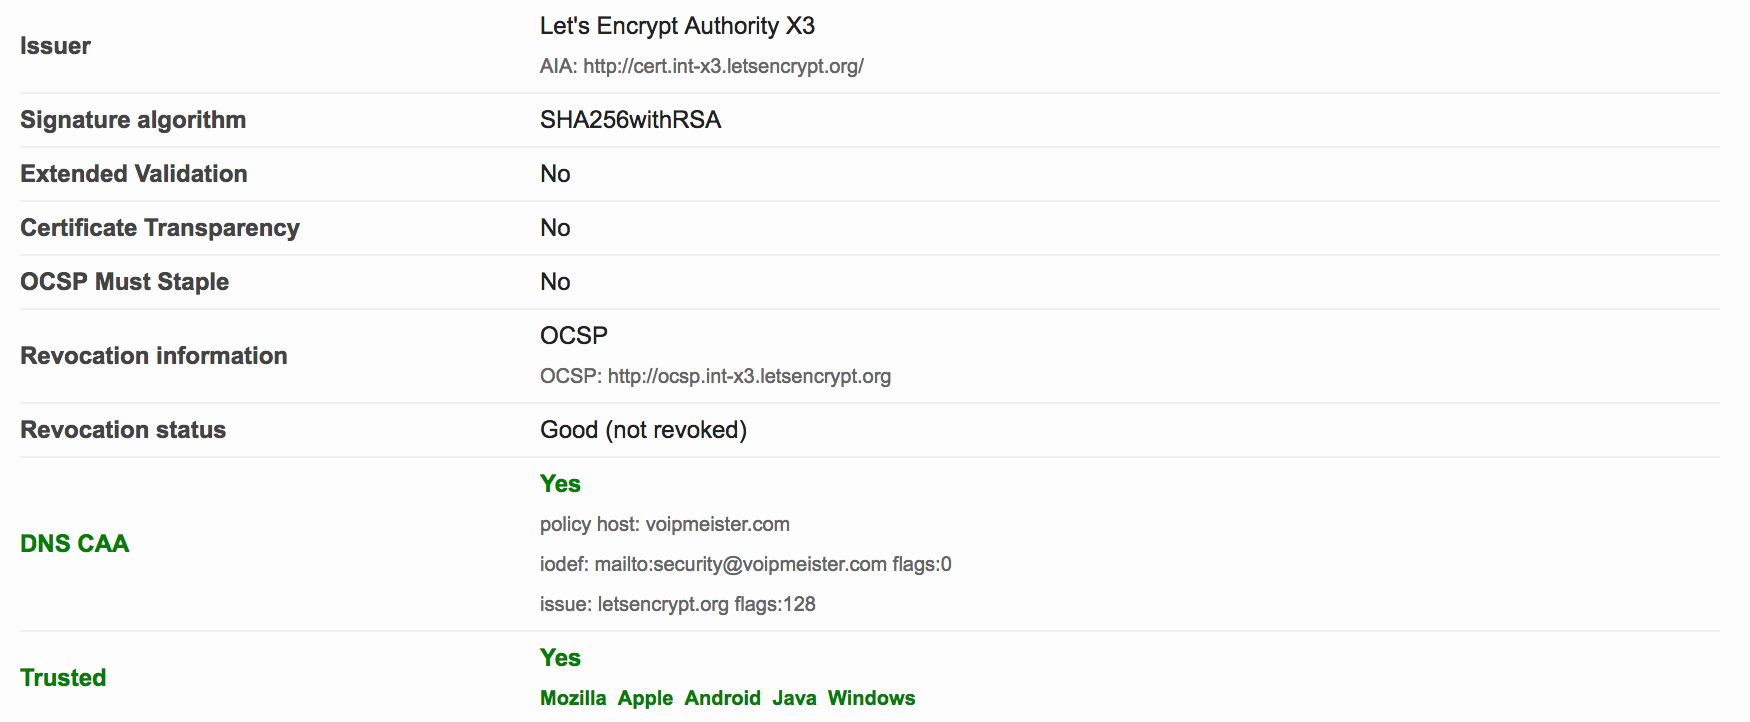
Do notice the extra green bar pertaining to CAA, and see the DNS CAA information in the details:
2017.12.29 - posted in security
The other day, I was in the process of moving my blog to Pelican, a static site generator. Browsing for some themes I stumbled upon Pelican Alchemy, which led me to the site of the Nairobi GNU/Linux Users Group, where I found some nice blog posts.
One in particular caught my eye and I intend to investigate it later this weekend: Using systemd Timers to Renew Let’s Encrypt Certificates.
Looks nice, and very useful for my webserver on which I have a bunch of Let’s Encrypt certificates installed. Automating the renewal sounds appealing and it was already on my list of ‘things to look into’.
2016.09.20 - posted in Linux
- log in to your CentOS 7 installation
- disable firewalld
systemctl stop firewalld
systemctl mask firewalld
- install the iptables-services package
yum install iptables-services
- enable the services at boot-time
systemctl enable iptables
systemctl enable ip6tables
systemctl start iptables
systemctl start ip6tables
- save the iptables configuration
service iptables save
service ip6tables save
- the configuration can now be found in the file
/etc/sysconfig/iptables
2010.11.25 - posted in Cisco
If Alert Central in the Real Time Monitoring Tool shows that there are core dumps, you can list them via the CLI.
admin:utils core list

    Size         Date            Core File Name
=================================================================
298200 KB   2010-11-24 17:36:51   core.13869.11.cef.1290616611
admin:
This is the equivalent of:
admin:file list activelog /core
<dir>   analyze
core.13869.11.cef.1290616611
dir count = 1, file count = 1
admin:
The latter has the advantage that you know the absolute path, which you need when you want to retrieve the file.
The file can be retrieved via the RTMT as well as via the CLI. All you need is an SFTP server on which you have write access, in this case I used a CentOS server running openssh. Here it goes:
admin:file get activelog /core/core.13869.11.cef.1290616611
Please wait while the system is gathering files info ...done.
Sub-directories were not traversed.
Number of files affected: 1
Total size in Bytes: 305356800
Total size in Kbytes: 298200.0
Would you like to proceed [y/n]? y
SFTP server IP: 10.133.133.133
SFTP server port [22]:
User ID: root
Password: ***********

Download directory: /root

The authenticity of host '10.133.133.133 (10.133.133.133)' can't be established.
RSA key fingerprint is 5b:8b:28:78:86:3d:9c:48:c9:2b:5e:42:e9:dd:bc:1d.
Are you sure you want to continue connecting (yes/no)? yes
.
Transfer completed.
admin:
Please not that the RSA key needs to be stored only once, it is presented upon the first connection you make with the SFTP server.
2010.05.16 - posted in Linux
I just installed Ubuntu 10.04 on my laptop. Works a treat, but that new theme… I don’t like it much and preferred the old theme (call me crazy but I do). So I headed for ‘Appearance’ and was about to select the old theme.. except… it is no longer part of the default installation.
If you have a machine with, say, Ubuntu 9.10 around, fixing this is fairly simple. Just plugin a USB stick on the old Ubuntu machine and go ahead:
cd /usr/share/themes
cp -R Human* /media/USBSTICK
Then remove the USB stick and insert into the 10.04 machine and continue:
sudo cp -R /media/USBSTICK/Human* /usr/share/themes
sudo chmod -R 755 /usr/share/themes/Human*
Then, go to System > Preferences > Appearance and select the Human-Clearlooks theme.