2024.04.12 - posted in retrocomputing
In the previous months, SuperIlu posted information about a wifi-modem replacement board for a Hayes Optima 2400 on Mastodon. This particular board from Tattler Solutions is a complete PCB replacement, featuring a cool audio handshake being played upon dialing! :D
From their site:
The WiFi Retromodem is a non-destructive replacement of the PCB in an external Hayes Smartmodem 1200 or 2400. Note: while it will fit in the later Smartmodems, the LEDs of the Retromodem in the Hayes Optima series aluminum cases are offset slightly from the letters below. The Retromodem is based on the ZiModem software available on Github. A PDF of the README.md file can be found at the bottom of this page. V4 adds SSH support.
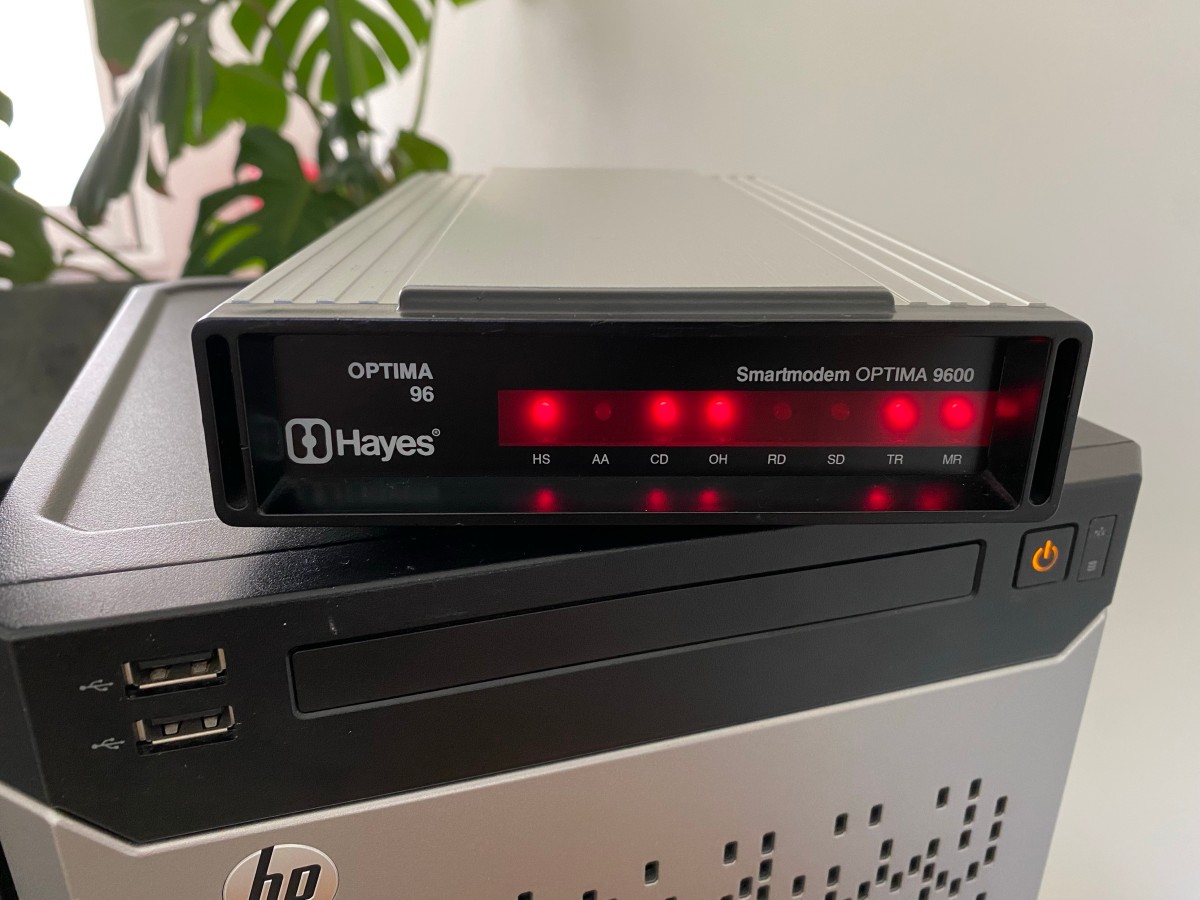
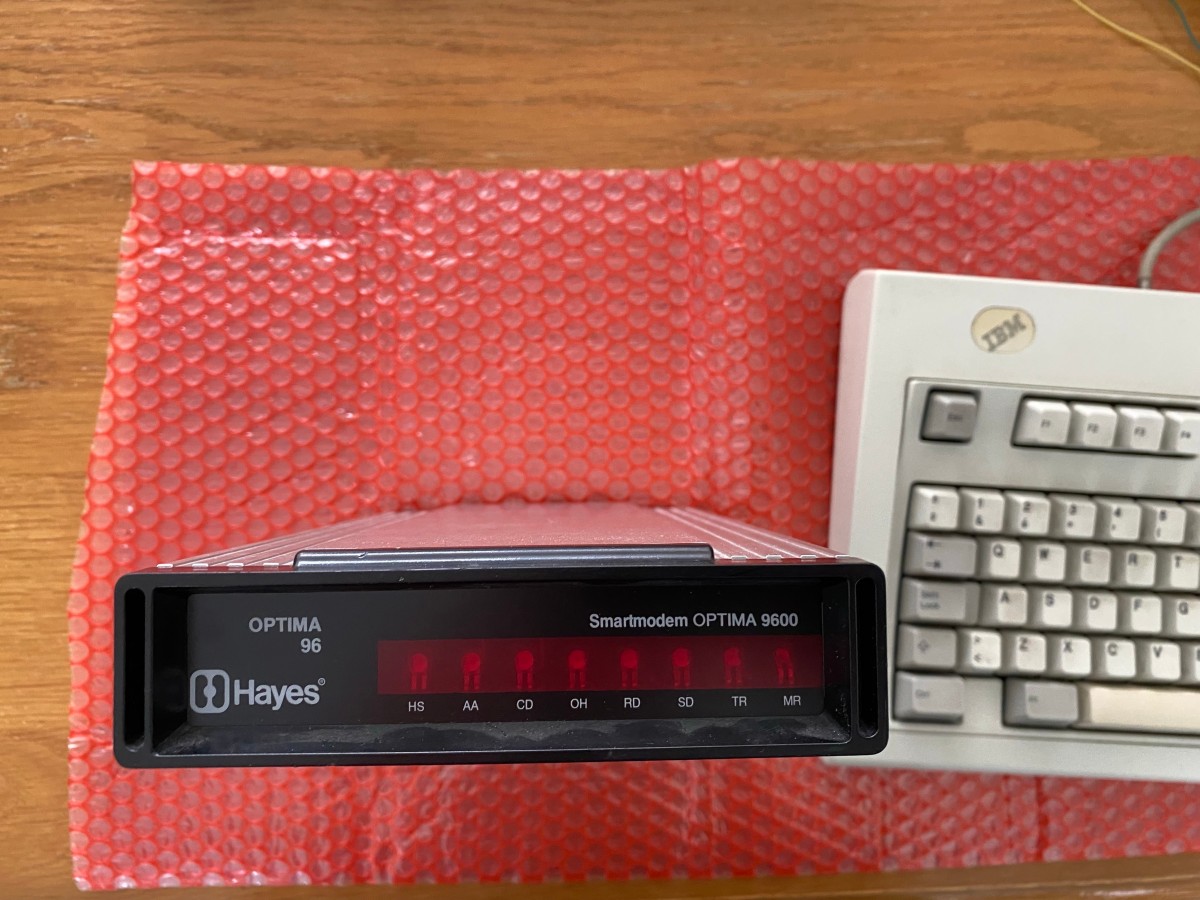
Growing up in the eighties and nineties, dialing into BBS’es and internet providers, I knew I had to get one. So the quest started by ordering a V4 board from Tattler Solutions and finding a suitable donor. Somehow this old stuff is hard to find in Europe (at least when I was looking for it). I bought a Hayes Optima 9600 on eBay without a power supply. I was honestly just looking whether the housing was ok, since the PCB would be replaced anyway. I found a donor with some nice ‘patina’ and had it shipped over.

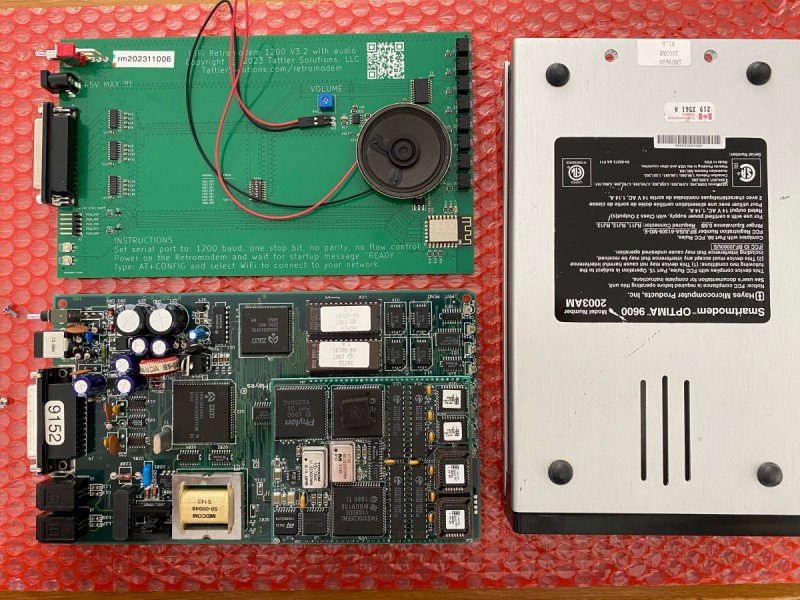
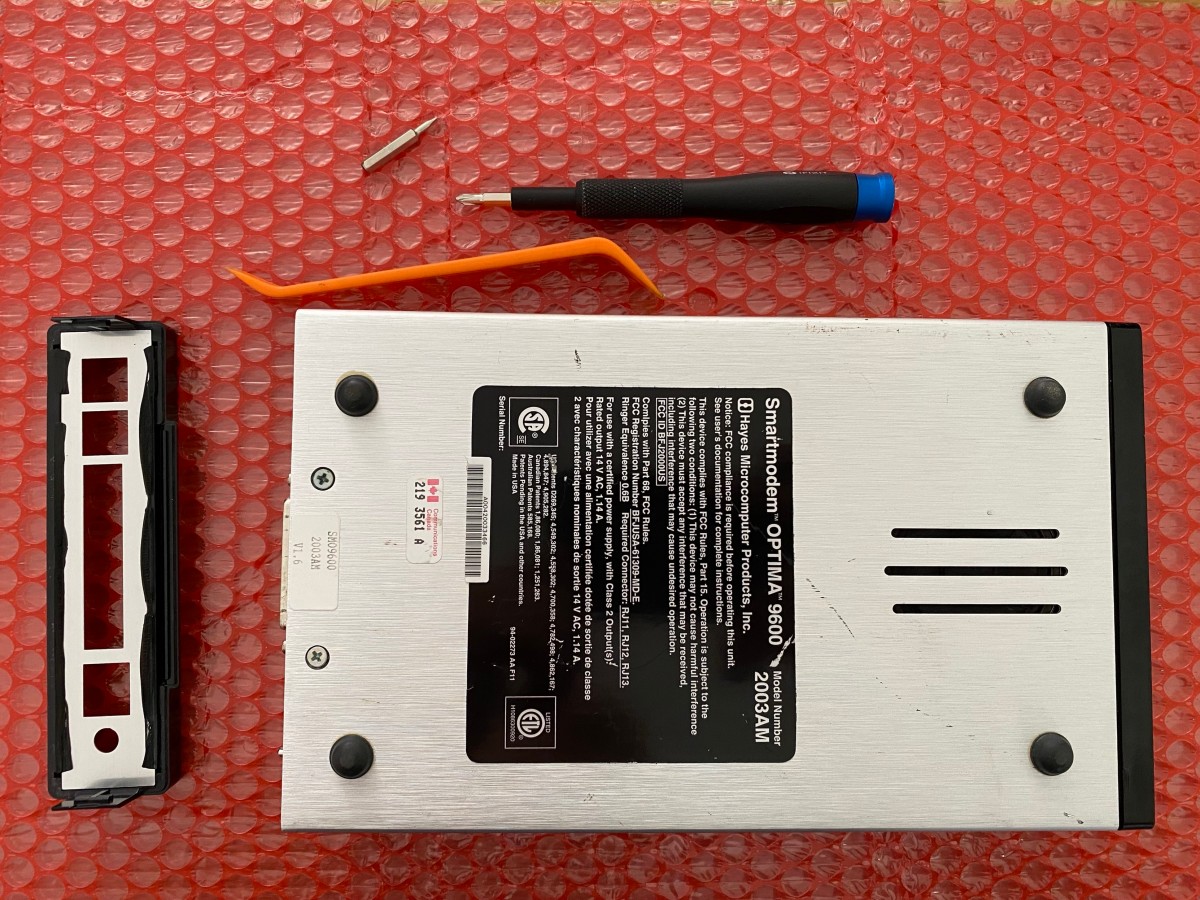
Once the replacement PCB arrived as well, I could start the transplant, which wasn’t too difficult as I just had to remove 2 screws and pop the back off, which is easy to do with a prying tool.
 s
Once the old PCB is removed, it looks like this:
s
Once the old PCB is removed, it looks like this:
After putting everything back together, we can dial BBS’es from systems with a serial port like it’s the nineties! The offset of the LEDs isn’t noticable at all.

Trying several different systems, I noticed that if your system is not equipped with 16550 UARTs, you’re limited to 57600 bps.
As I had no use for the old PCB, I listed it for free on a local marketplace where someone declared interest. I sent it to its new owner.
2021.03.03 - posted in macOS
Since 2019, Apple is favoring the zsh shell over Bash. The reason has not been made public, but logic dictates it is because of the licensing differences between Bash and zsh. Bash is GPL-licensed; zsh is released under the MIT-license which is less restrictive apparently. A writeup can be found here. I have been using Bash since forever and it is the default shell for all the Linux servers I manage at work. For me, it makes sense to keep using Bash on my laptops as well.
Setting the default shell to Bash
It’s not difficult to switch back to Bash when Apple -yet again- has changed the shell to zsh after a macOS update. Just open a Terminal window and type:
Verify the shell
To verify the shell has indeed changed to Bash, open a new Terminal window and type:
Example output:
Depending on the shell you use, the shell prompt might also look different. Bash uses a dollar sign instead of the precentage sign used by zsh for example.
Available shells
In case you’re curious what shells are available to you, it’s easy to list them. In a Terminal window, type:
This will produce output like:
# List of acceptable shells for chpass(1).
# Ftpd will not allow users to connect who are not using
# one of these shells.

/bin/bash
/bin/csh
/bin/dash
/bin/ksh
/bin/sh
/bin/tcsh
/bin/zsh
Thoughts
Zsh does have advantages over Bash, some of which can be read here.
2021.02.11 - posted in Git
Another note-to-self, mostly. When working with Git and Python virtual environments, it’s nice to have a shell prompt that’s informative. I have been using various prompts in the past, some of which were great to use. After I reinstalled my MacBook I ended up not knowing what I’d been using up till then. Searching for this prompt led me to the discovery of this great prompt. I’ve been using it since I discovered it, and I still like it today :)
The prompt is very informative about Git repositories (if you happen to be in one) and virtual environments, if one is active.
2018.01.03 - posted in SSL
A little while ago I wrote about improvements in the SSL configuration of my webserver. You can read about that here.
I decided to check my SSL configuration with Qualys’ SSL Server Test again to see if there was room for improvement. Sure enough, there was.
The report
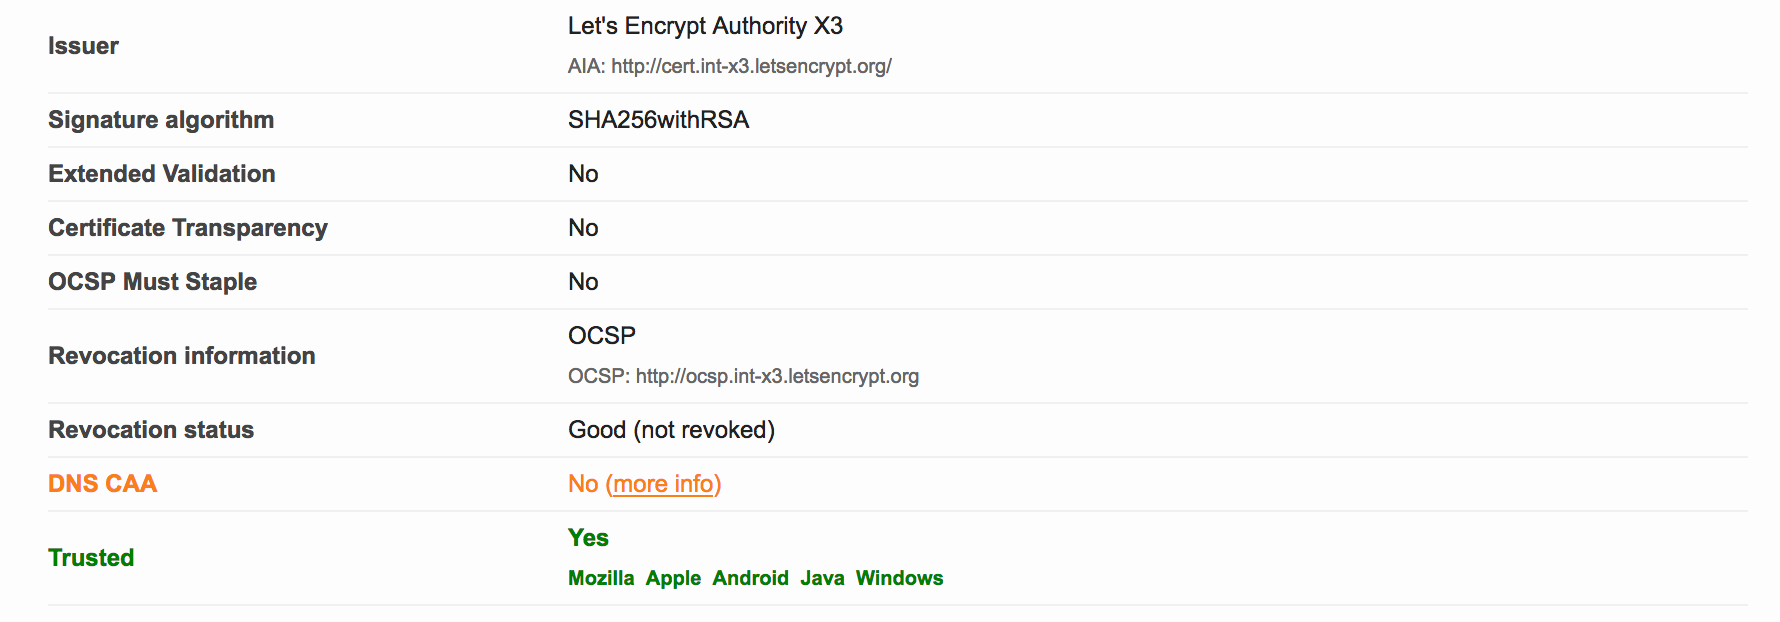
The report was still A+. However, I noticed two items that could possibly improved upon:
- No
DNS CAA - I’ll address that in this post
Weak 3DES ciphers - I’ll write another post about this
The cause
I had not yet implemented Certification Authority Authorization (or CAA), since I didn’t know what it was. The link in the SSL Labs report provides more information. In short, the PKI ecosystem is provided with a new control mechanism to restrict which CA’s may issue certificates for a specific domain. All you need to do is list the CA’s that you use for a specific domain in new CAA DNS record for that domain.
As of September 8, 2017, upon issuance of a new certificate for a domain, the CA is supposed to check the CAA records for that domain. If there is no matching CAA policy for the CA, the issuance should be denied (and it MAY be reported if the domain holder has iodef CAA record(s)).
From the RFC:
If the domain name holder specifies one or more iodef properties, a
certificate issuer MAY report invalid certificate requests to that
address.  In the following example, the domain name holder specifies
that reports may be made by means of email with the IODEF data as an
attachment, a Web service [RFC6546], or both:

$ORIGIN example.com
.       CAA 0 issue "ca.example.net"
.       CAA 0 iodef "mailto:security@example.com"
.       CAA 0 iodef "http://iodef.example.com/"
For those of you who want to have more in-depth information, see RFC 6844.
The solution
In my case, for voipmeister.com, I am using Let’s Encrypt as the CA for my certificates. So, if I want to implement a CAA policy, all I need to do is add DNS records like this:

The second one tells any interested party that I only use Let’s Encrypt as my CA. The first record is a request to inform me at a specific email address upon violations or problems concerning certificate issuance. I created those DNS records by hand, but you may also use the SSLMate CAA Record Helper.
After we wait a while for the recent DNS change to take effect, we can recheck with the SSL Labs Tester. The result is this:
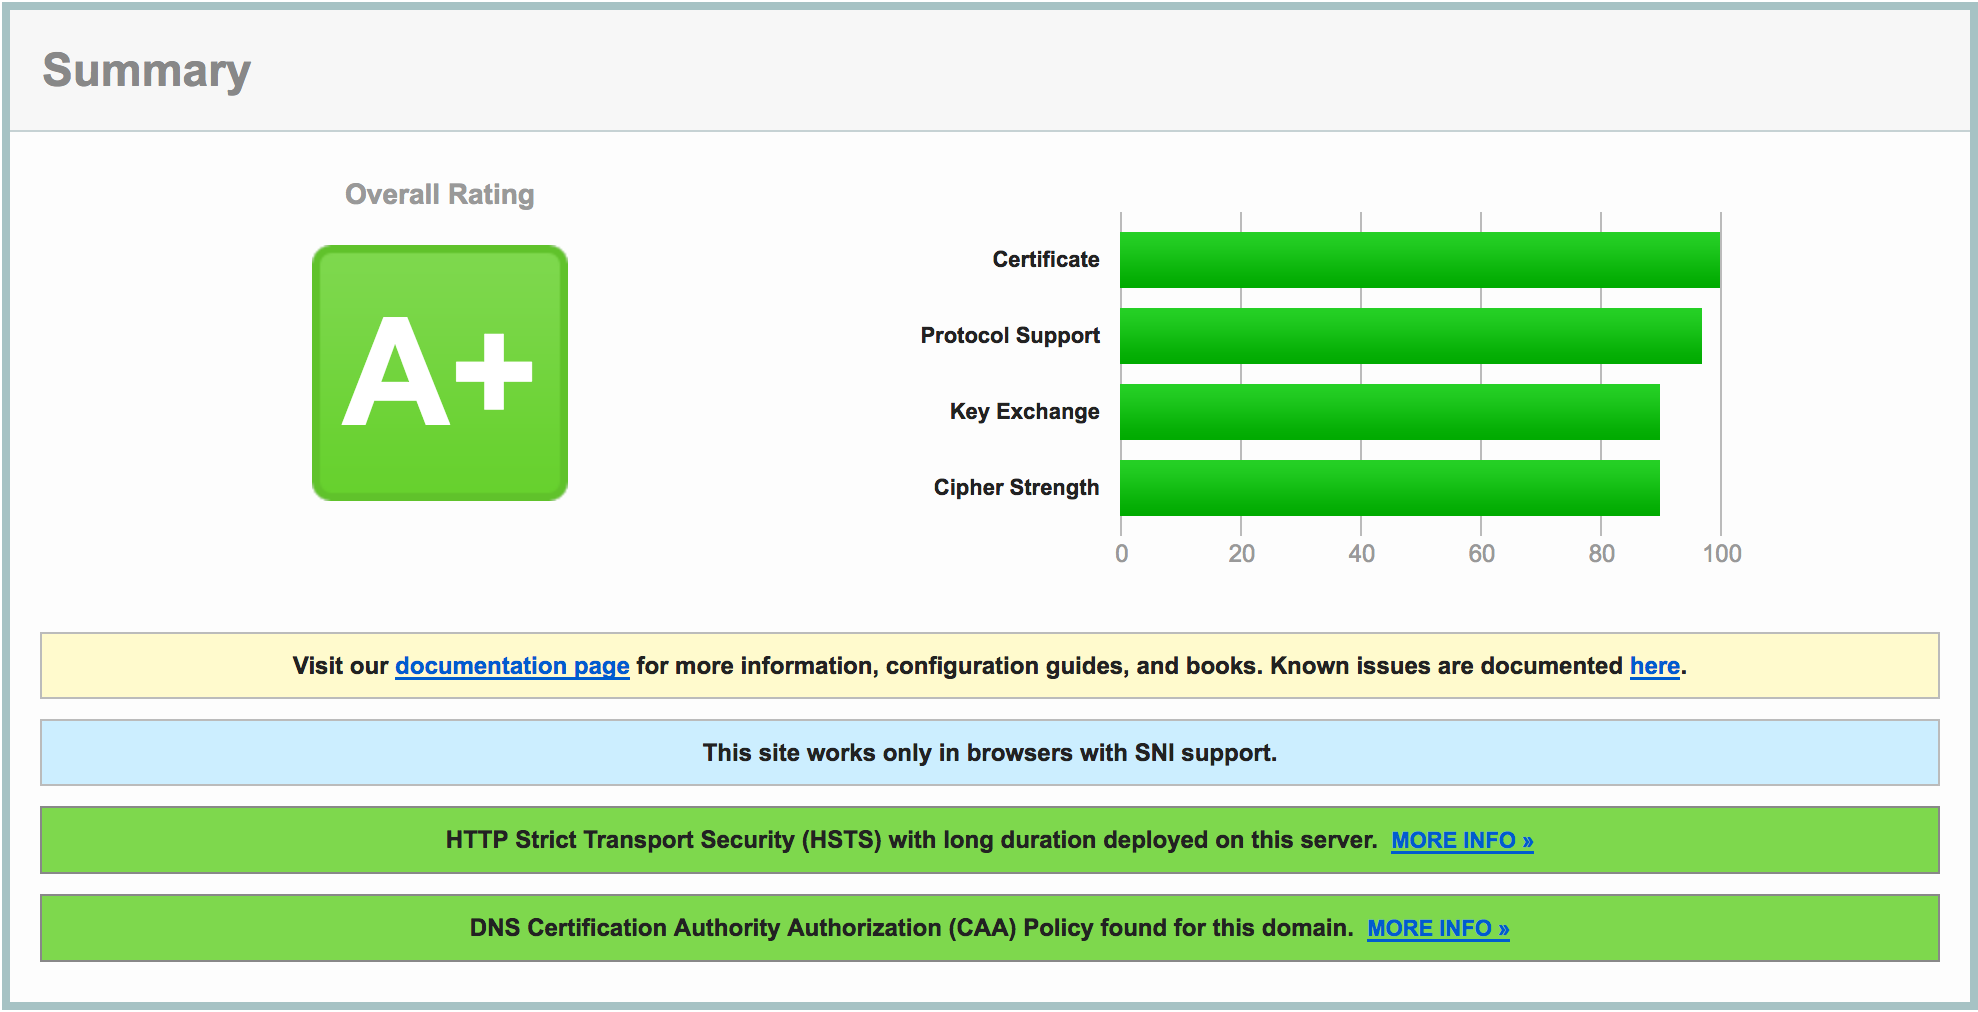
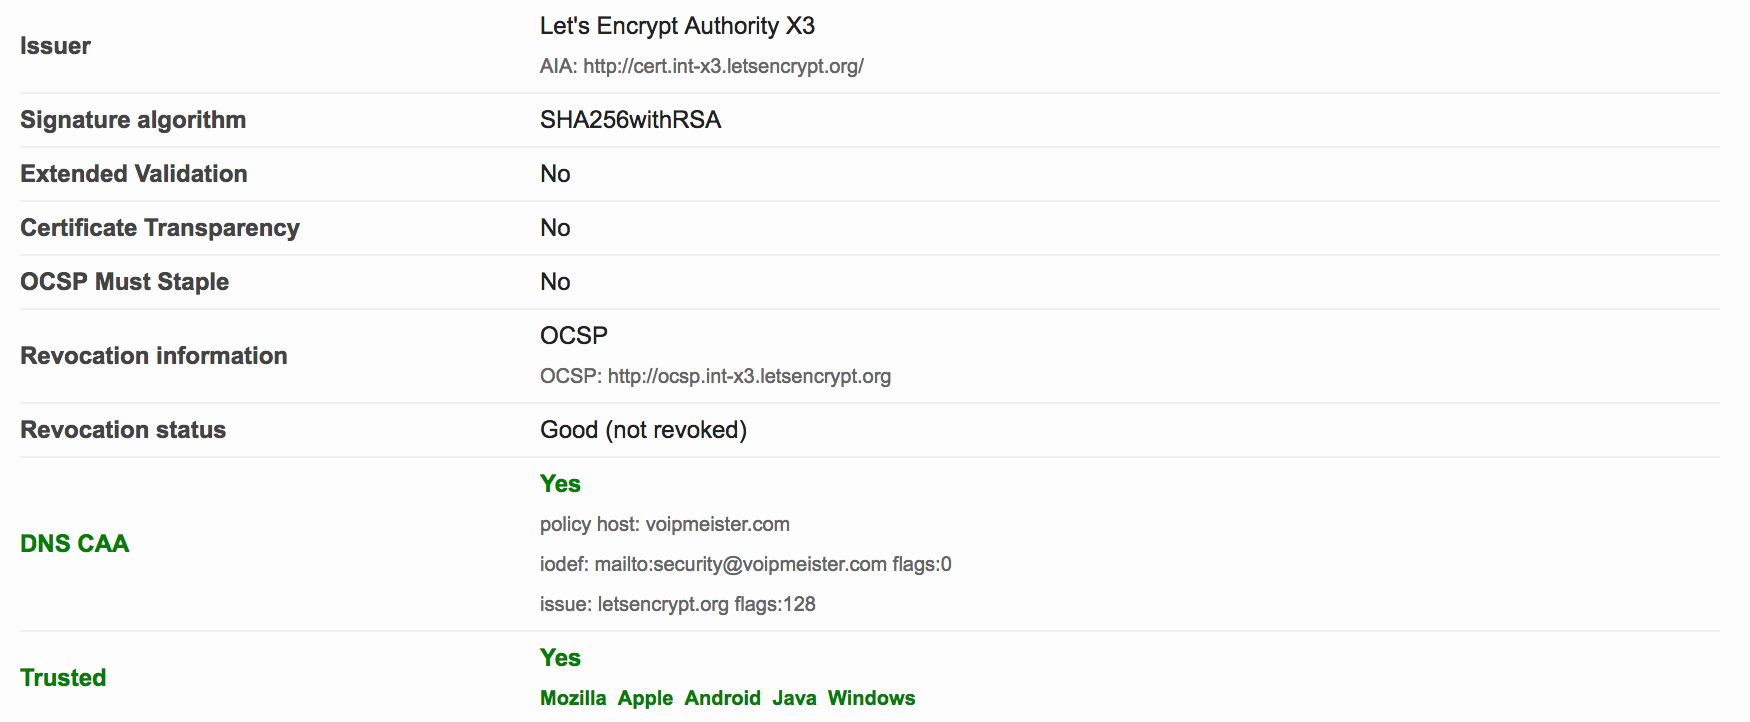
Do notice the extra green bar pertaining to CAA, and see the DNS CAA information in the details:
2017.12.29 - posted in security
The other day, I was in the process of moving my blog to Pelican, a static site generator. Browsing for some themes I stumbled upon Pelican Alchemy, which led me to the site of the Nairobi GNU/Linux Users Group, where I found some nice blog posts.
One in particular caught my eye and I intend to investigate it later this weekend: Using systemd Timers to Renew Let’s Encrypt Certificates.
Looks nice, and very useful for my webserver on which I have a bunch of Let’s Encrypt certificates installed. Automating the renewal sounds appealing and it was already on my list of ‘things to look into’.

 s
Once the old PCB is removed, it looks like this:
s
Once the old PCB is removed, it looks like this: